The hand goes up, then stops. The wrench that lived on the left hook for two years is not there — it is somewhere on the bench behind the parts washer, under a rag. Eight minutes later, the job that should have taken three minutes finally starts.
Every workshop knows this scene. What separates the shops where tools come back to the same spot every time from the shops where they wander is not discipline or personality. It is the cabinet itself — how it is zoned, labeled, and arranged so that putting a tool back is easier than dropping it anywhere else. The crews that stay fast are the ones who organize tool cabinet drawers around the work, then let the layout — not willpower — keep it that way.
Start With a Full Empty
No drawer organizer, foam insert, or label survives a cabinet that has never been emptied. Set aside an afternoon, pull everything out, and put it on a bench in daylight. Sort into three piles: tools the trade uses weekly, tools that come out once a season, and tools that belong to another bay entirely.
While the cabinet is empty, check it over too. Drawer slides that feel gritty, loose shelf clips, a pegboard hook that has gone missing — all of it is easier to fix now than after everything goes back. A cabinet that runs smoothly is a cabinet people actually use properly.
Assign Zones: Doors, Drawers, Shelves, Bottom
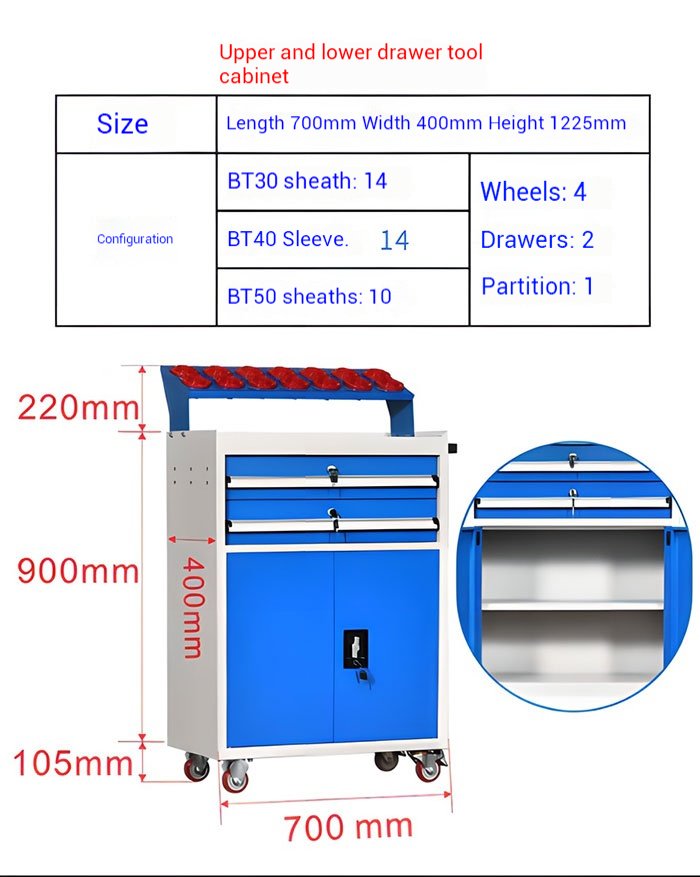
Picture a full-height cabinet as four zones, ranked by how quickly a hand should reach each one. The most-used tools go where the hand lands first, and the least-used items sink to the bottom. This single idea does more for daily speed than any organizer purchase.
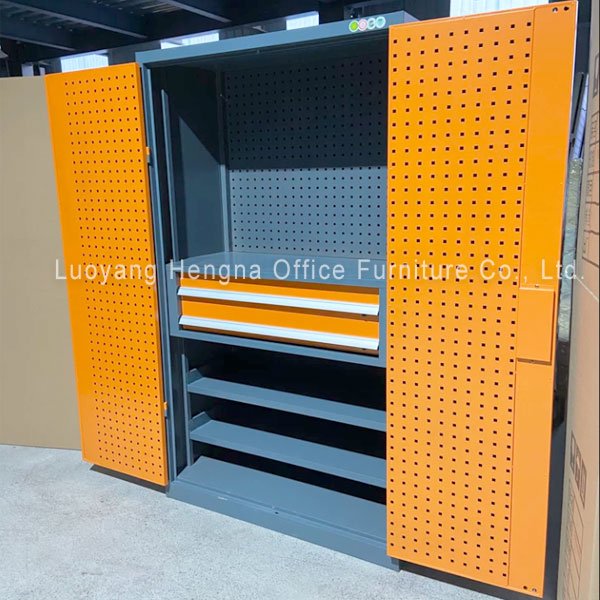
- Door interiors (pegboard): the tools touched every shift — wrenches, pliers, screwdrivers, hammers. Opening the door should feel like the tools are being handed to you. Ideally, grabbing and returning takes seconds, with no rummaging.
- Upper drawers: precision items — calipers, gauges, small torque tools. Kept out of dust and out of reach of heavy objects sliding around.
- Middle shelves: medium-frequency tools and backup items — specialty wrenches, spare parts, cases that get used weekly.
- Bottom shelf or open base: the heavy world. Power tool cases, buckets, jigs, anything dense. Weight low keeps the cabinet stable and saves backs on the way up.
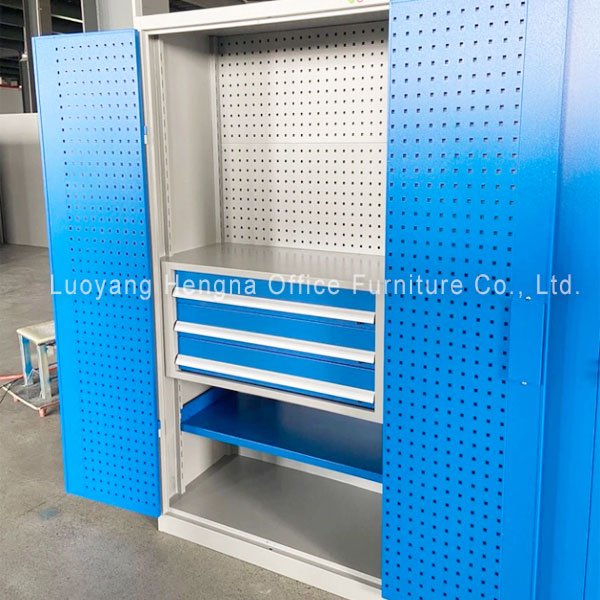
Drawers That Show You What Is Inside
A drawer loses its value the moment its contents disappear under a jumble. Three cheap habits fix that permanently.
Give every drawer one category, not one era. A drawer labeled “metric sockets” holds metric sockets and nothing else. When the category is clear, any technician — including the new hire next month — can maintain the system.
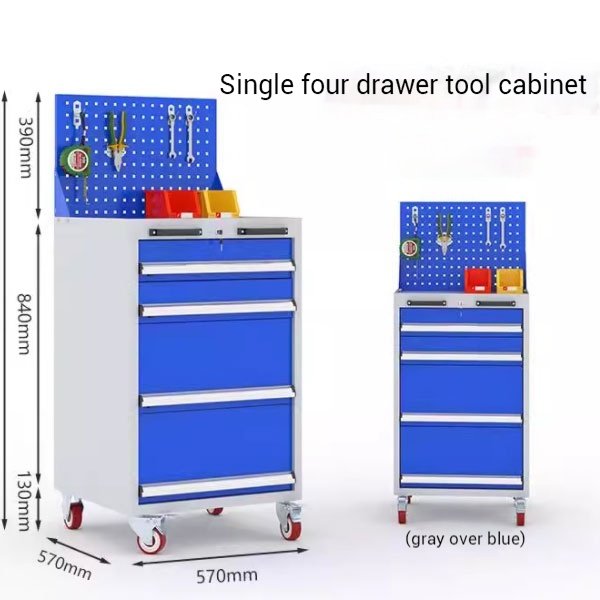
Make the layout visible with dividers. Adjustable dividers turn a wide drawer into distinct lanes, and lanes make missing tools obvious at a glance. The classic workshop trick: trace the tool outline or leave the dividers sized around the tools, so an empty lane reads as a missing tool, not lost space.
Put labels where they will be read. Names on the outside of the drawer front do nothing after the first week. The labels that actually work are the ones on the inside edge, read when the drawer is open and the tool is in hand.
Pegboard Doors: Numbered Stations End the Handover Problem
The hardest thing to organize is not the tool. It is the agreement about where the tool lives. In single-operator cabinets that agreement lives in one person’s memory. The moment two shifts share a cabinet, memory stops scaling.
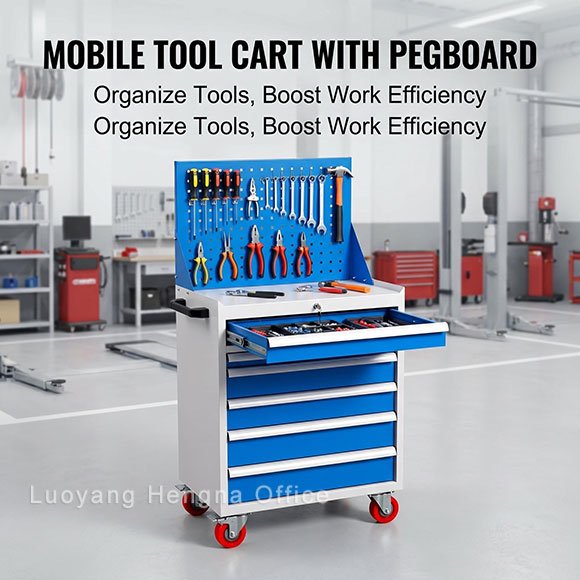
The answer is positions, not instructions. A pegboard with numbered spots — each tool assigned a permanent station — turns the question “where does this go?” into “what number is this?”. With numbered positions, tools return to the right place even when they are put back by someone who never uses them. It also makes end-of-shift checks unemotional: open the door, look for empty numbered spots, done.
This is also the practical way to share a cabinet between trades without conflict. Wrench set to stations 01 to 06, socket drive to 07, torque wrenches to 08 and 09. The system answers the questions so people do not have to.
Parts Bins and the Color Code Trick
Fasteners are the great underminer of organized cabinets. Every shop has a drawer of screws that was sorted once and never again, because sorting screws by size is abstract and slow.
Color skips the abstraction. Assign a color to a category — blue for machine screws, red for fuses and electrical, yellow for washers and small fittings, purple for specialty hardware — and pick parts by color first, size second. A technician sent for “the screws from this bracket” does not need to read anything. They open the blue bins.
The same colors across all cabinets in the workshop extend the trick further. When every cabinet in the building uses the same color logic, anyone can find a fastener in any bay, even one they rarely set foot in.
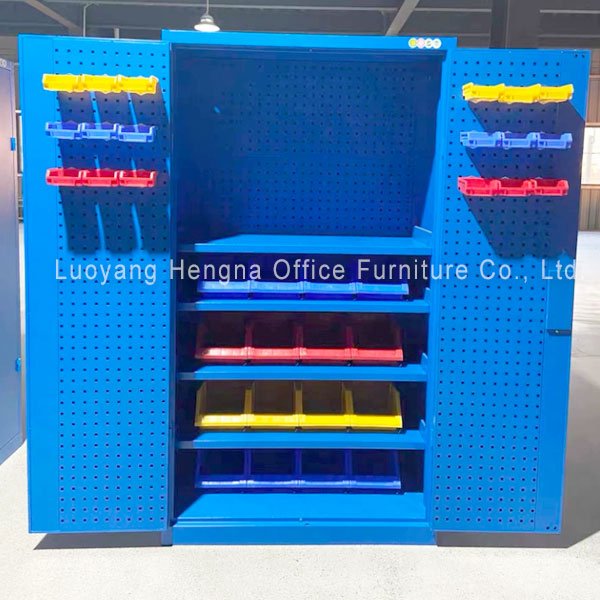
Organize a 4-Shelf Cabinet Efficiently
Shelf-only cabinets do not have the drawers’ advantage of dust protection, but they can still be quick for daily work. The efficient four-shelf pattern runs like this: hand tools hang from the door pegboard; the top shelf holds cases and spare equipment; the middle shelf handles tools used weekly; the bottom takes the heaviest items — usually power tool cases and consumables — where lifting is shortest and stability is highest.
Shelf dividers or shallow parts bins placed directly on the shelves keep the middle levels from turning into a slide. And with adjustable shelves, a seasonal re-check keeps the spacing matched to what is actually on them — taller gaps for tall cases, tighter levels for small parts.
Keeping It Organized Past Week One
Any system survives its first week. The difference is what happens in week five, when the shop is busy and putting things back properly feels slower than leaving them out.
- Make the return trip faster than the alternative. If the correct spot is easy to reach, it gets used. If a tool feels awkward to hang back, people will stop hanging it.
- Run a five-minute reset. Once a week, someone opens every door and scans the numbered stations. Missing spots get a note; misplaced tools go home.
- One in, one out for tools. New tools get a station before they enter the cabinet, or they immediately break the order that organizes everything else.
Common Questions
Q: How should I organize a 4-shelf tool cabinet?
A: Hang the most-used tools on the door, keep light and infrequent items up top, put weekly tools on the middle shelves, and place the heaviest cases at the bottom. Add shallow bins to the middle levels so small items cannot slide around.
Q: What belongs in drawers and what belongs on the door?
A: The door takes tools that are grabbed bare-handed all day. Drawers take anything delicate, dusty, or sharp that benefits from being covered — precision measuring tools, loose cutters, small calibration equipment.
Q: Are foam inserts worth it for a working cabinet?
A: For precision tools and mixed small kits, yes — outlines make missing tools visible immediately. For everyday wrenches and pliers on a busy floor, dividers and numbered pegs usually win, because they are faster to work with, not just prettier to look at.
Q: How do we keep one cabinet organized when three shifts share it?
A: Number every position, post a simple card inside the door, and hold each shift to a two-minute scan at handover. When the layout has no ambiguity, organizing stops being about personality and becomes routine maintenance.
The Short Version
Empty the cabinet first, then rebuild it in zones: daily tools on the door, precision in drawers, weekly items on shelves, heavy cases at the bottom. Divide drawers by category, number every pegboard position, and let color handle fasteners. Add a five-minute weekly reset, and the cabinet keeps itself in order — even with three shifts and a busy floor.
Want to organize tool cabinet drawers this way from day one? Send us your tool list and how many people use the cabinet — we will match the drawer, shelf, and pegboard configuration to your crew, factory-direct.